Home
Submit a Ticket ⇱
MyStAndrews ⇱
Apple Resources ⇱
FAQ ⇱

Adobe Creative Cloud

  • Adobe PDF Documents
  • Using Apple Dictation and ‘Read out Loud’ in Adobe Acrobat

Apple

  • Enable Stapling for a Print Job on a Mac
  • How to set up Google Chrome

AV

  • Microsoft Teams Rooms
  • Scheduling Meetings for a Microsoft Teams Room
  • Upper Primary Classroom – iPad AV Control
  • Primary Classroom
    • Connecting to an Apple TV using Airplay
    • Lower Primary (Prep-2) Classroom AV
    • Pairing a Redcat Microphone
    • Redcat Soundfield Amplification
    • Upper Primary Classroom – iPad AV Control
  • Secondary Classroom
    • Connecting to an Apple TV using Airplay
    • Flexible Secondary Classroom
    • Secondary School Classroom AV
  • Aquatic Centre
    • Illawong Audio
  • Learning Hub
    • Hive Rooms AV System Guide
  • Video Conferencing
    • BYOD VideoBars (Ideas Room/Secondary Conference Room)
    • Microsoft Teams Rooms
    • Mobile Video Conferencing Trolley
    • Scheduling Meetings for a Microsoft Teams Room
  • Known Issues & Troubleshooting
    • Changing Your Screen Settings for High Resolution Displays.
    • Sound not playing from Display: Changing your audio output settings
    • Video or Audio Plays in Fast Forward or Audio is High Pitched.
    • Videos not streaming smoothly (Airplay)
  • Sporting Venues
    • Portable Scoreboard (LED Wall)

Connectivity

  • Adding the St Andrew’s Portal to Your Home Screen (iPhone & iPad)
  • Connecting a Personal Phone or Tablet to the College Wi-Fi

Department Software

  • Downloading Media from Pixevety
  • Navigation and Search in Pixevety

General Troubleshooting

  • Clear Your Browsing Data in Google Chrome
  • How to Enable Pop-ups for Google Chrome

General Help Guides

  • Accessing St Andrew’s Network Drives on a Mac
  • Changing your College Account Password
  • Create a Quiz in Google Forms
  • How to Copy a Canva Project to Another Team
  • Printer Troubleshooting

Onedrive and Sharepoint

  • OneDrive Icons
  • Setting up Onedrive

MyStAndrews Portal

  • Co-Curricular Roll Marking
  • Co-Curricular Sign-Up
  • How to Book meeting Rooms and Resources

Microsoft Office 365

  • Adding Shared Mailboxes to Microsoft Outlook
  • PowerPoint – External Media / YouTube
  • Outlook
    • Adding Shared Mailboxes to Microsoft Outlook
    • Adding Users to a Group in Outook Online or Microsoft Teams
    • Create College Email Signature in Outlook
    • Outlook Out of Office Replies – Mac and Windows

Printing

  • Enable Stapling for a Print Job on a Mac
  • How To Set Up Staff ID Card to Print

Teams

  • Auto Launch the Microsoft Teams app
  • Transferring Calls in Microsoft Teams

Tass

  • Viewing the Parent Directory and Sharing Contacts on Teacher Kiosk
  • Home
  • St Andrew’s KB Articles
  • AV
  • Upper Primary Classroom – iPad AV Control

Upper Primary Classroom – iPad AV Control

Table Of Contents
  • Turning On AV System
  • Linking/Unlinking Displays
  • Volume Control
  • Changing Inputs
    • Independent Inputs
  • Powering Off

Some classrooms at the College are controlled via touch panels or iPads as part of the Q-SYS environment. As more rooms are updated, this system will expand across both Primary and Secondary Schools. 

For information on Secondary School classrooms controlled via touch panels, please refer to this document.

For updated Primary School classrooms, the AV system is now controlled by your iPad. Instructions on using the systems can be found within this document.

Turning On AV System #

1. Locate the Q-SYS UCI app on your iPad and tap to open it.
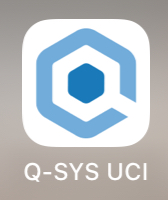
If the app is not installed, please contact Technical Services to set it up on your iPad.

2. A list of rooms will appear. Select your room to open it’s controls.
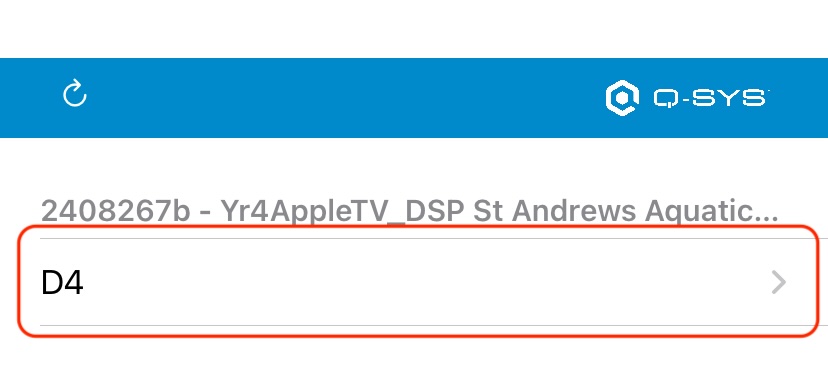
This will be limited to the room that you’re responsible for, if your room isn’t showing, contact Technical Services.

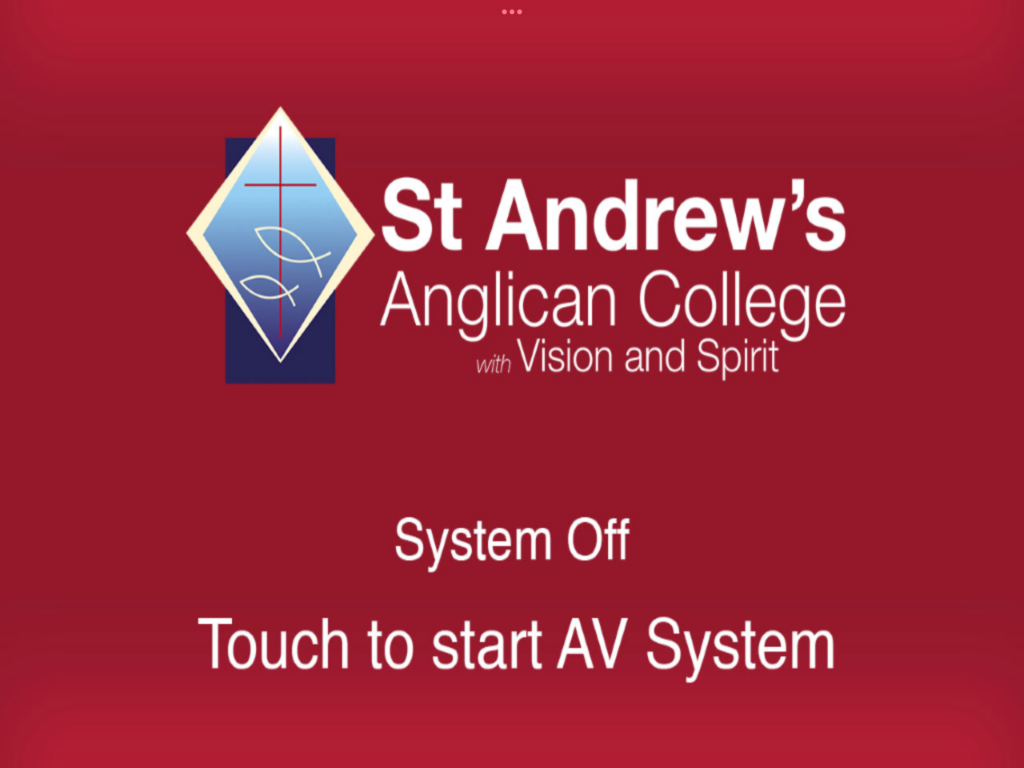
3. Touch anywhere on the screen to turn on the AV system.

Note: It will take 15-30 seconds to turn on.
Linking/Unlinking Displays #

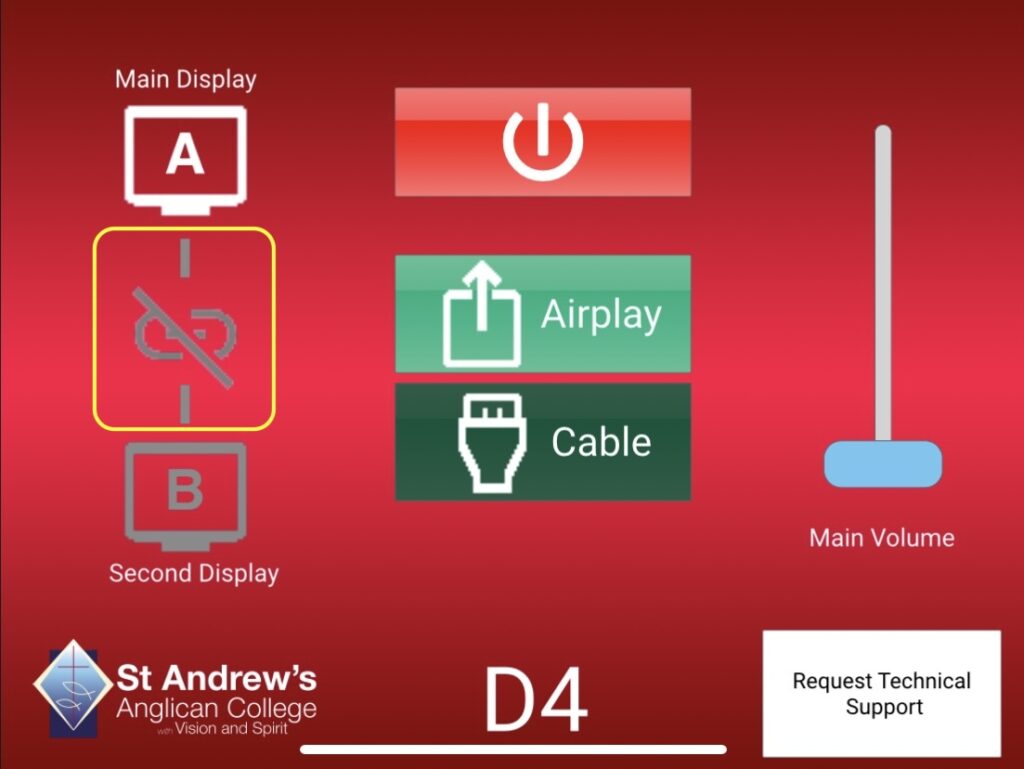
You can link the two classroom displays within the control panel. This will mirror the Primary Display (A) onto the Secondary Display (B).

You can link the screens by pressing the link button highlighted below. If the button appears grey, the displays are unlinked.
Screenshot

Note: Airplay (Apple TV) can only be mirrored from the Primary Display (A) to the Secondary Display (B).

Volume Control #

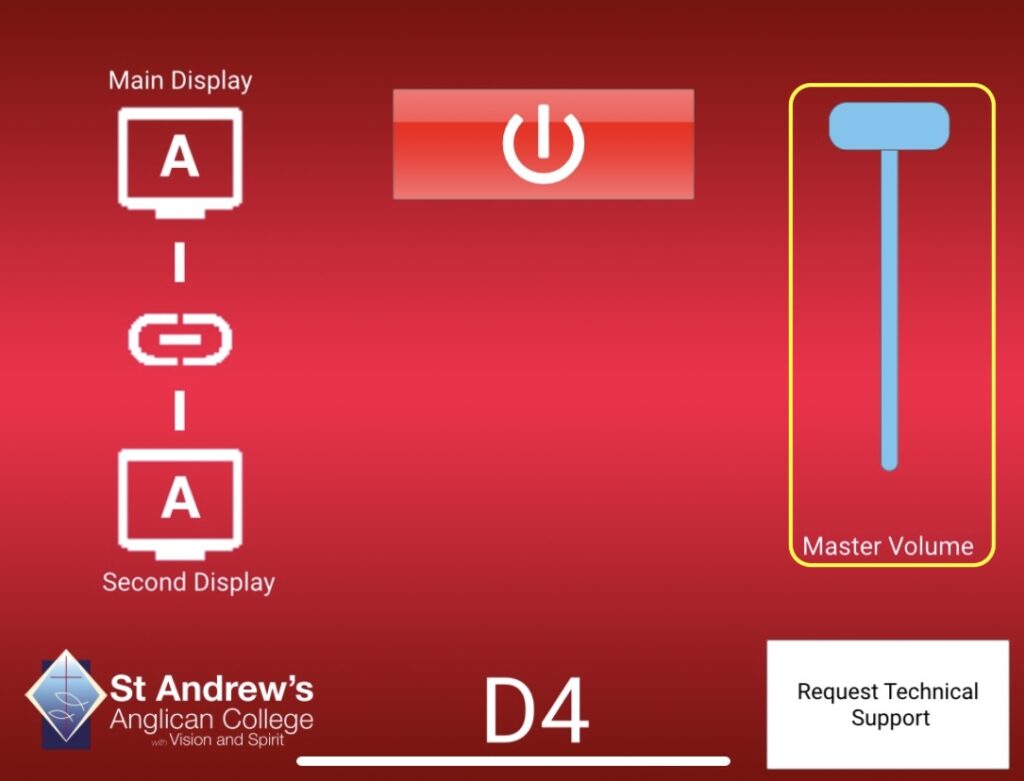
To adjust the volume, use the Master Volume slider on the right-hand side of the control panel.
Screenshot

To adjust the screens volume independently, select the screen you wish to adjust (A or B) and move the slider.

Note: adjusting the volume for one screen will automatically unlink the displays.

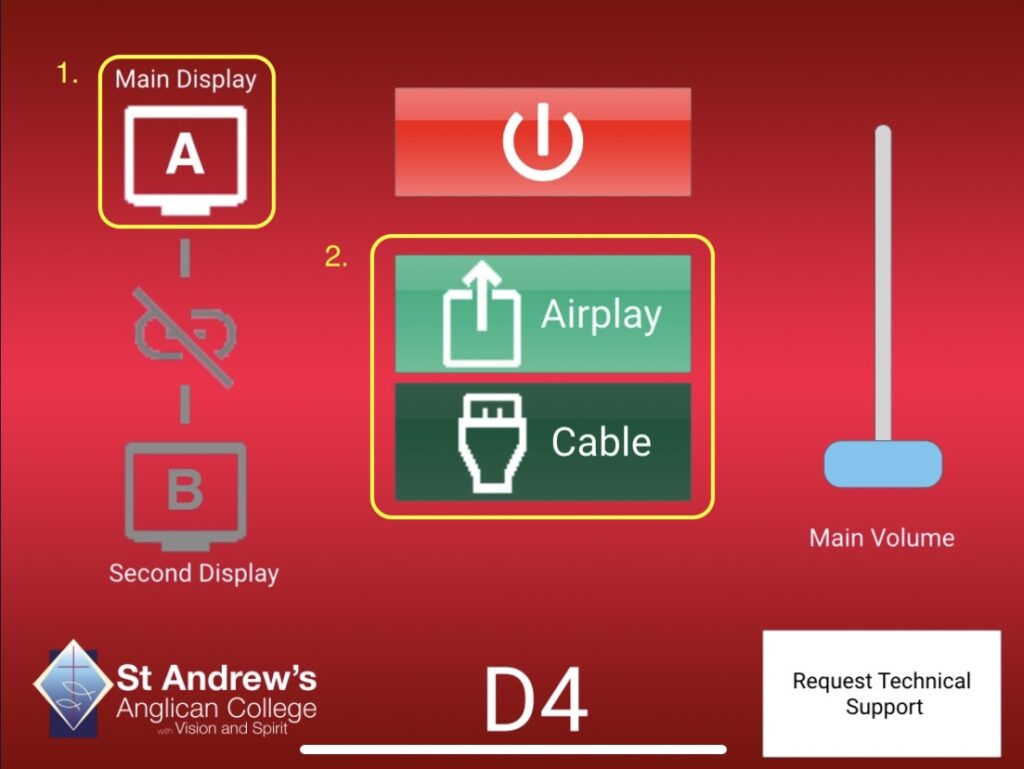
Changing Inputs #

To change the input source:

  1. Select the display (A or B) that you want to adjust.
  2. Choose the input source:
    • AirPlay (Apple TV) or
    • Cable (HDMI)
Screenshot

Independent Inputs #

These Inputs can be adjusted independently in the same fashion. Select the display (A or B) for which you want to change the input and then select the input (Airplay or Cable) you wish to receive for that display.

Note: Doing this will unlink the displays

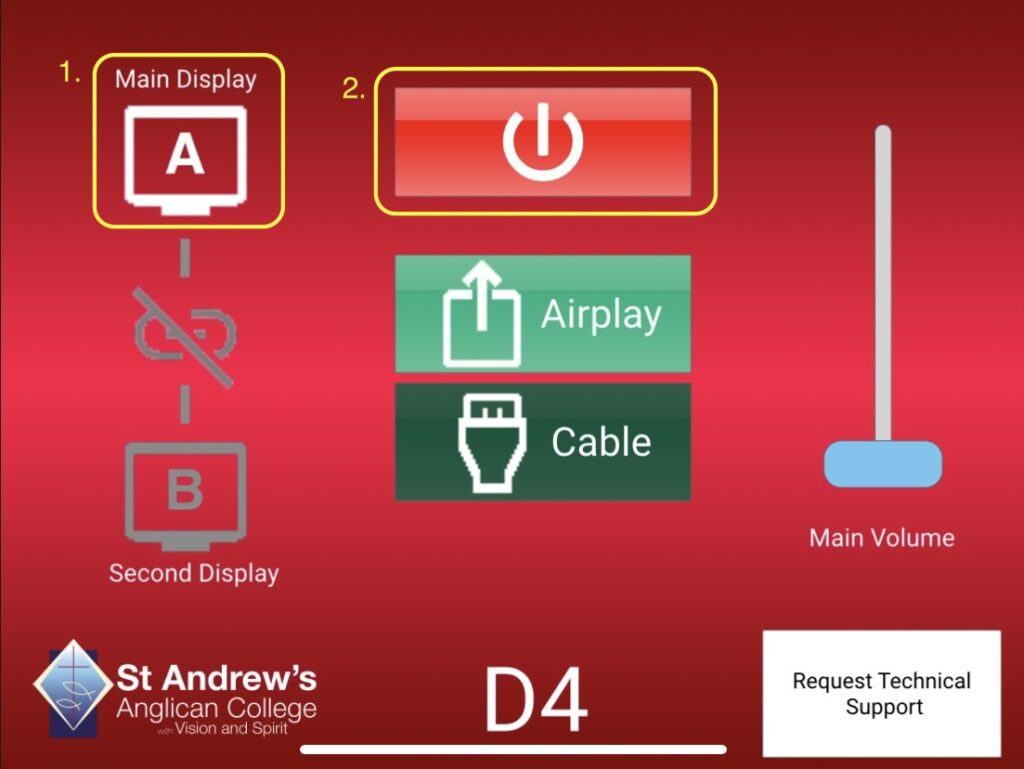
Powering Off #

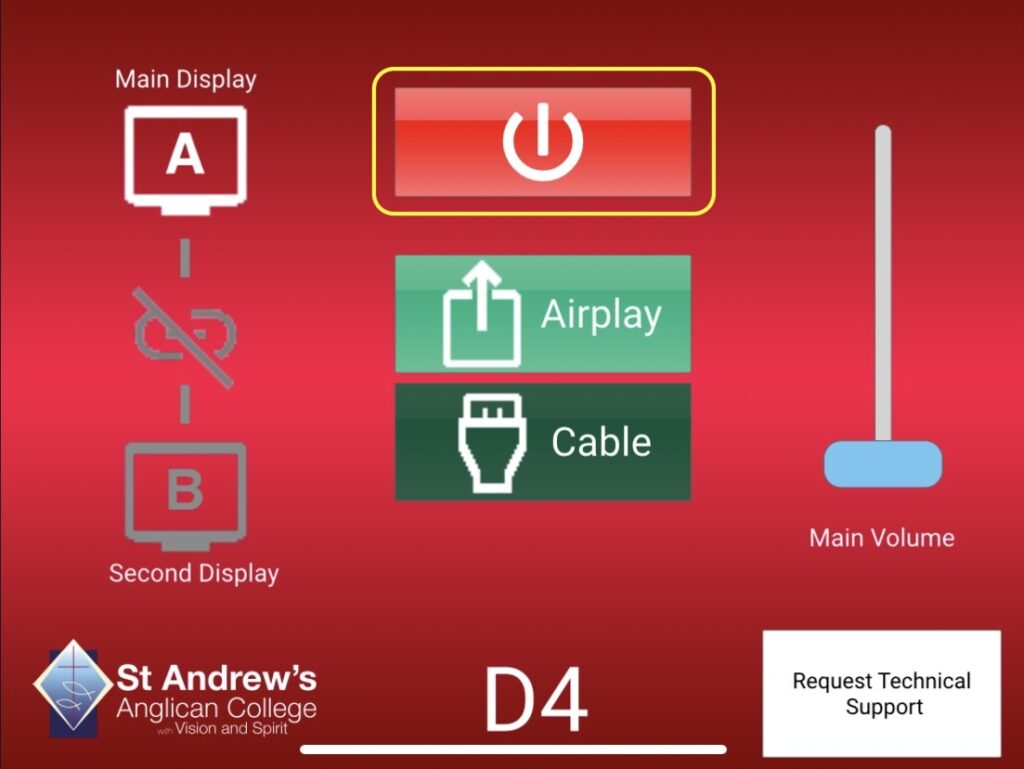
Select the red power button on the control screen. The system will take 15-30 seconds to fully power off.
Screenshot

This can be done independently for each screen by:

  1. Selecting the screen (A or B) that you want to power off
  2. Pressing the red power button
Screenshot
Updated on 23 October 2024

SChool resources

  • St Andrew’s Website
    MyStAndrews Portal
  • Canvas

Resources

  • Main Menu
  • Apple Resources

© 2025 ·

St Andrew's Anglican College Knowledge Base

· All rights reserved