Home
Submit a Ticket ⇱
MyStAndrews ⇱
Apple Resources ⇱
FAQ ⇱

Apple

  • Enable Stapling for a Print Job on a Mac
  • How to set up Google Chrome

AV

  • Microsoft Teams Rooms
  • Scheduling Meetings for a Microsoft Teams Room
  • Upper Primary Classroom – iPad AV Control
  • Primary Classroom
    • Connecting to an Apple TV using Airplay
    • Lower Primary (Prep-2) Classroom AV
    • Pairing a Redcat Microphone
    • Redcat Soundfield Amplification
    • Upper Primary Classroom – iPad AV Control
  • Secondary Classroom
    • Connecting to an Apple TV using Airplay
    • Flexible Secondary Classroom
    • Secondary School Classroom AV
  • Aquatic Centre
    • Illawong Audio
  • Learning Hub
    • Hive Rooms AV System Guide
  • Video Conferencing
    • BYOD VideoBars (Ideas Room/Secondary Conference Room)
    • Microsoft Teams Rooms
    • Mobile Video Conferencing Trolley
    • Scheduling Meetings for a Microsoft Teams Room
  • Known Issues & Troubleshooting
    • Changing Your Screen Settings for High Resolution Displays.
    • Sound not playing from Display: Changing your audio output settings
    • Video or Audio Plays in Fast Forward or Audio is High Pitched.
    • Videos not streaming smoothly (Airplay)
  • Sporting Venues
    • Portable Scoreboard (LED Wall)

Adobe Creative Cloud

  • Adobe PDF Documents
  • Using Apple Dictation and ‘Read out Loud’ in Adobe Acrobat

Connectivity

  • Adding the St Andrew’s Portal to Your Home Screen (iPhone & iPad)
  • Connecting a Personal Phone or Tablet to the College Wi-Fi

Department Software

  • Downloading Media from Pixevety
  • Navigation and Search in Pixevety

General Troubleshooting

  • Clear Your Browsing Data in Google Chrome
  • How to Enable Pop-ups for Google Chrome

General Help Guides

  • Accessing St Andrew’s Network Drives on a Mac
  • Changing your College Account Password
  • Create a Quiz in Google Forms
  • How to Copy a Canva Project to Another Team
  • Printer Troubleshooting

Onedrive and Sharepoint

  • OneDrive Icons
  • Setting up Onedrive

MyStAndrews Portal

  • Co-Curricular Roll Marking
  • Co-Curricular Sign-Up
  • How to Book meeting Rooms and Resources

Microsoft Office 365

  • Adding Shared Mailboxes to Microsoft Outlook
  • PowerPoint – External Media / YouTube
  • Outlook
    • Adding Shared Mailboxes to Microsoft Outlook
    • Adding Users to a Group in Outook Online or Microsoft Teams
    • Create College Email Signature in Outlook
    • Outlook Out of Office Replies – Mac and Windows

Printing

  • Enable Stapling for a Print Job on a Mac
  • How To Set Up Staff ID Card to Print

Tass

  • Viewing the Parent Directory and Sharing Contacts on Teacher Kiosk

Teams

  • Auto Launch the Microsoft Teams app
  • Transferring Calls in Microsoft Teams
  • Home
  • St Andrew’s KB Articles
  • AV
  • Video Conferencing
  • BYOD VideoBars (Ideas Room/Secondary Conference Room)

BYOD VideoBars (Ideas Room/Secondary Conference Room)

Table Of Contents
  • Connecting to the VideoBar
  • Ideas Room
  • Secondary Conference Room
  • Setting up your Conference software

The Ideas Room and H Block Conference Room have VideoBar devices to allow quality audio and video experience for online meetings through Zoom, Teams and other conferencing products.
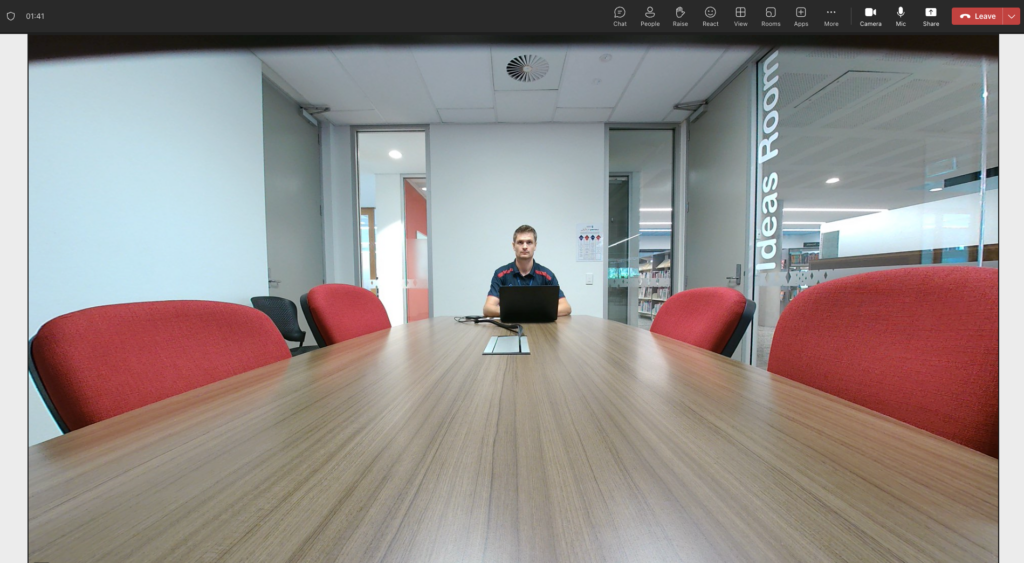
Unlike the Teams Room systems in Illawong and Main Admin, these devices are an accessory device (peripheral) rather than stand alone system, and therefore require a user to connect their laptop to the device to make/join a call.
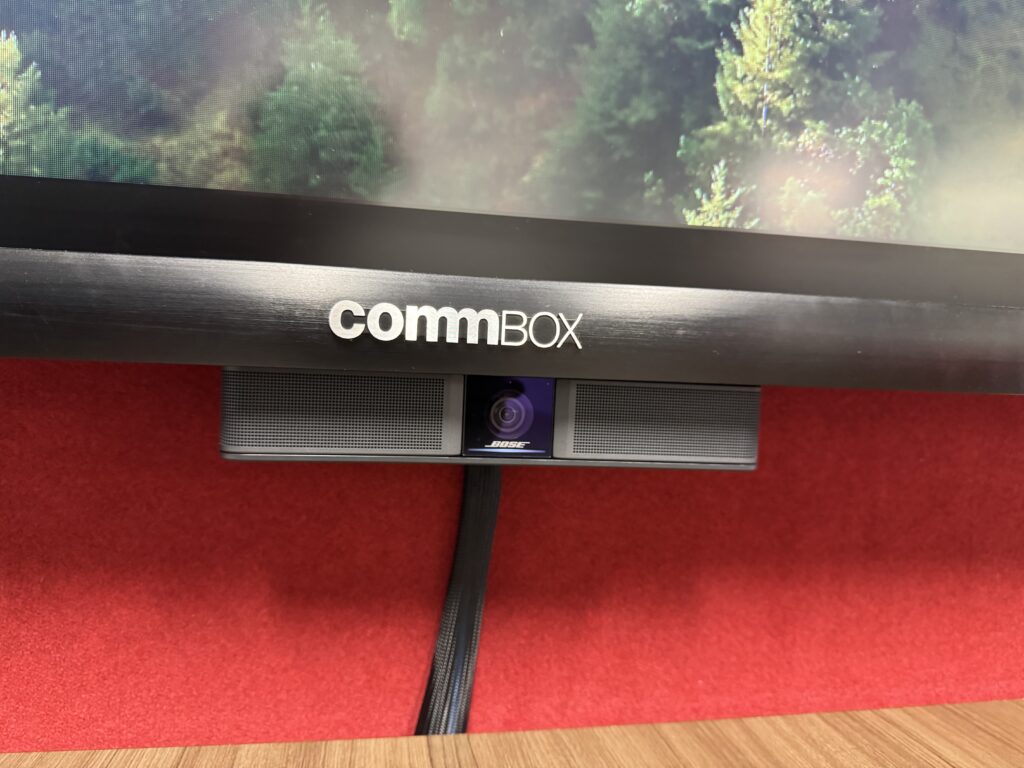
Ideas Room

Connecting to the VideoBar #

Turn on the display using the remote or room controls.

Set the display to the appropriate Input Source – HDMI2 – using the remote or room controls.

Ideas Room #

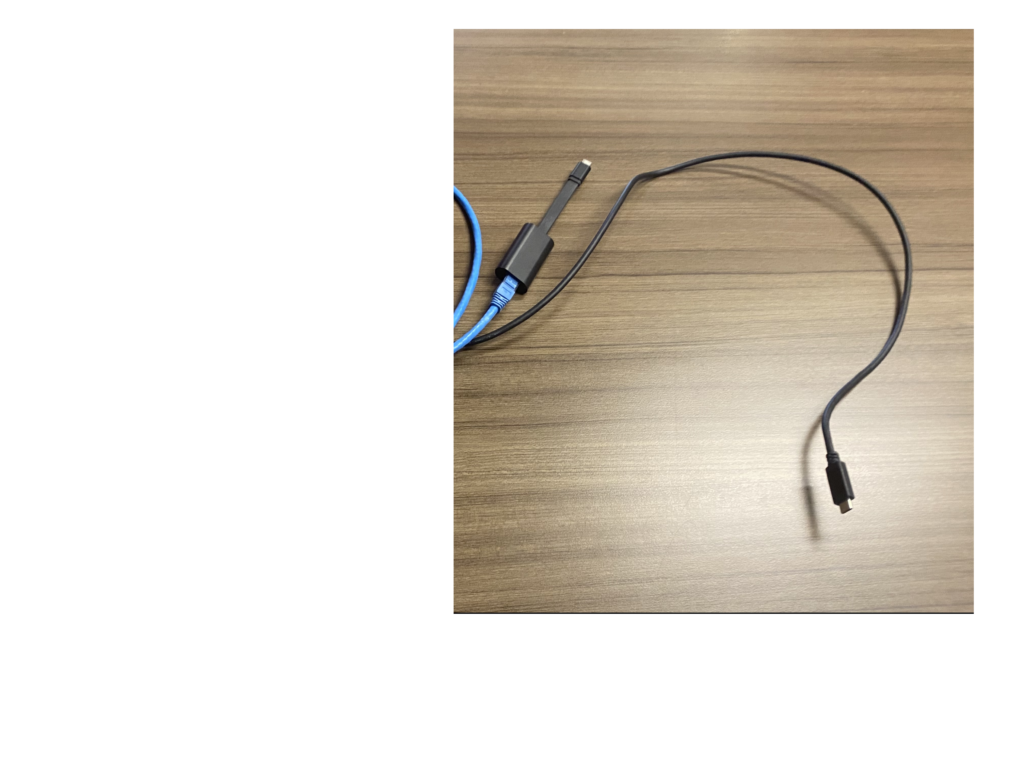
In the Ideas Room, one USB cable is provided. Connect this to your laptop using an adapter if required. This will allow you to connect to the screen and the VideoBar simultaneously.
Secondary Conference Room #

In the Secondary Conference Room a single USB-C cable will provide video connectivity as well as connection to the VideoBar.

Connect the single USB-C cable to your laptop. To enable video connection via USB-C, software is required – DisplayLink Manager. For many staff this will already be installed. If DisplayLink Manager is running the icon highlighted below will be visible in the top bar.

If this icon is not visible open the Launchpad and search for DisplayLink Manager. If it is installed, click the icon to launch the software.
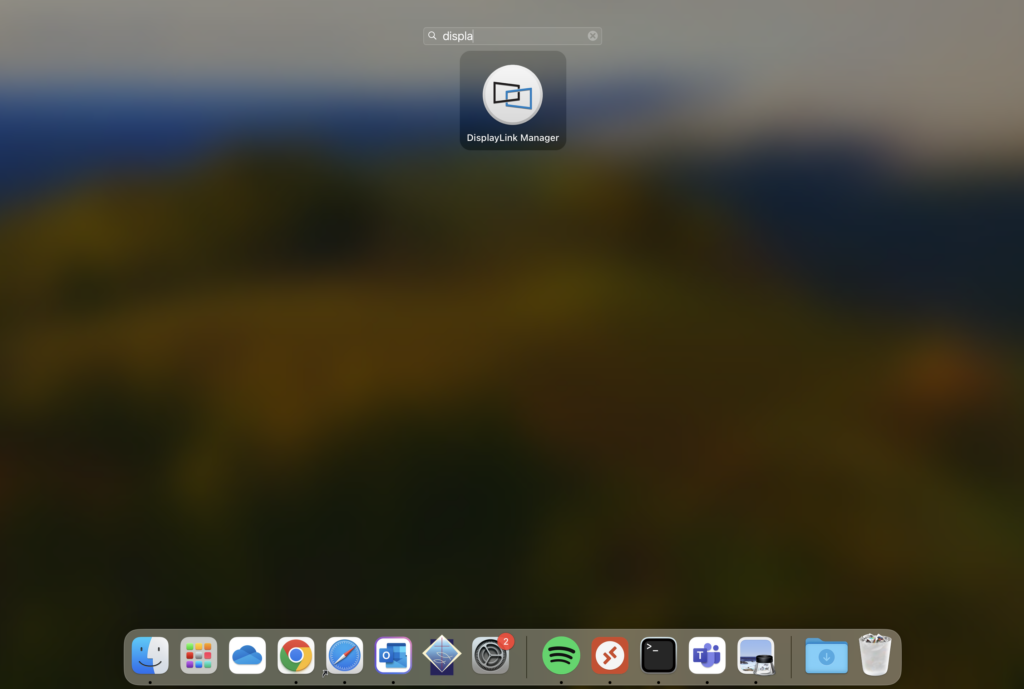
If it does not appear in the Launchpad, you will need to install the software from the Self Service app.
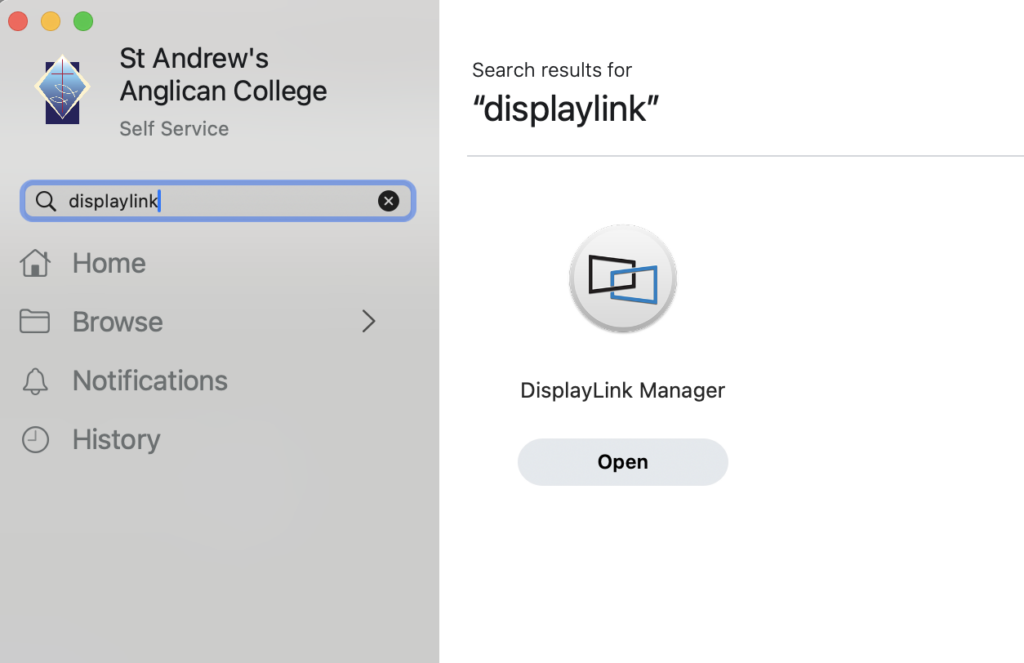
Once DisplayLink Manager is running, your laptop should be connected to the room display.

Setting up your Conference software #

Open your conferencing software and open the settings to choose the VideoBar as your audio and video device. Teams will allow you to adjust these settings upon joining a meeting.
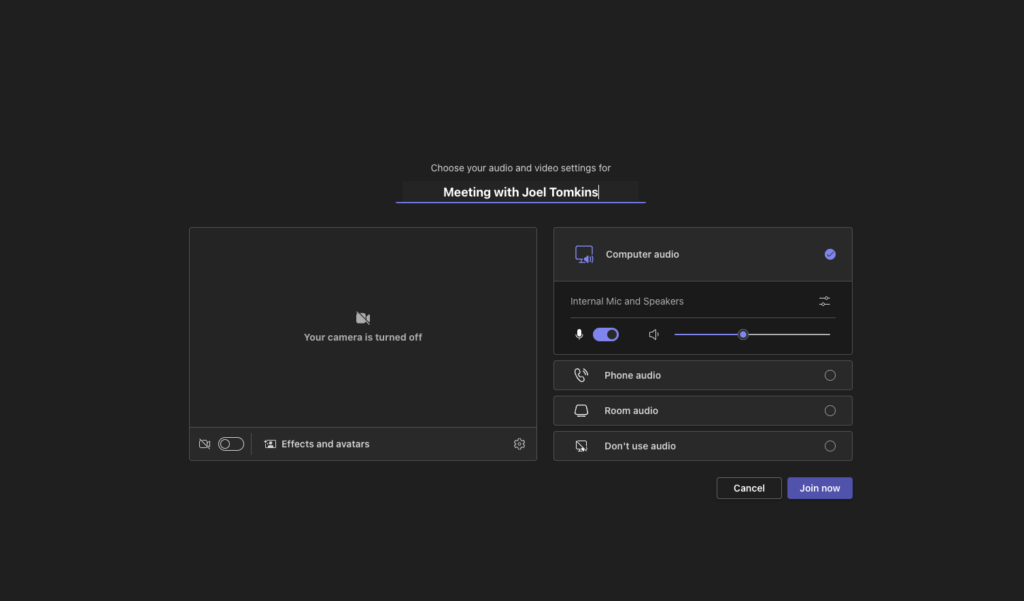
Choose Computer audio from the list of audio options. The currently selected microphone and speakers are shown – in this case Internal Mic and Speakers. To choose a new device, click on the settings button.
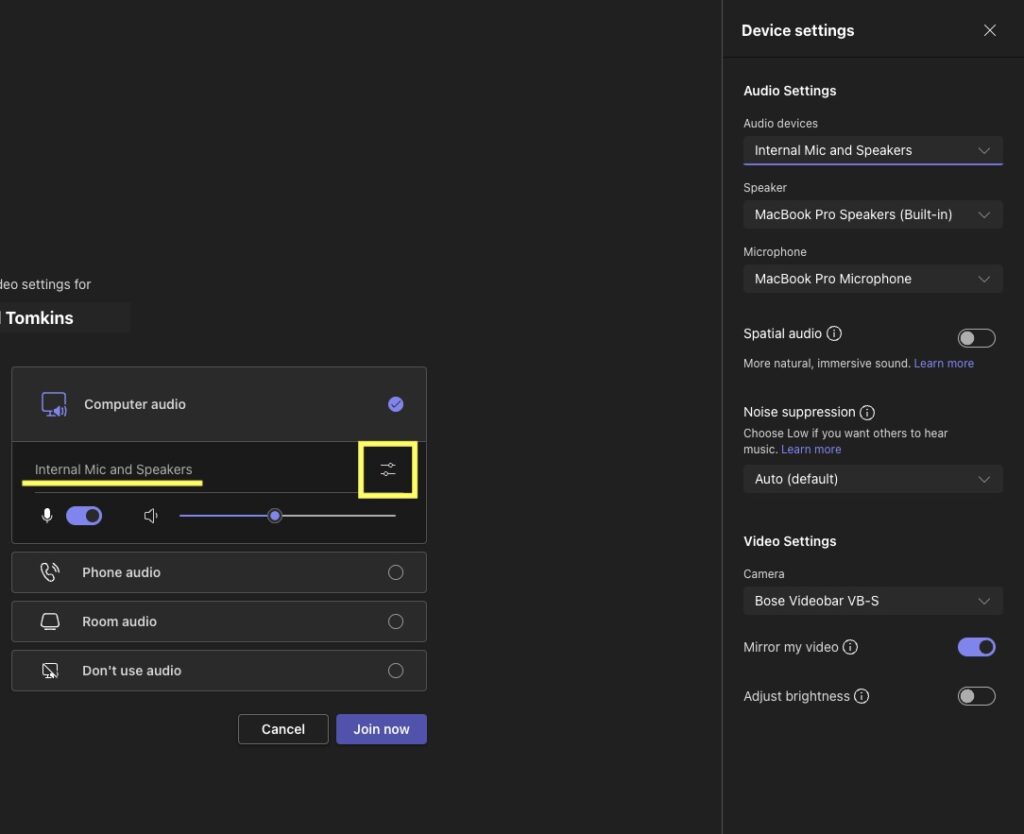
Select Bose VideoBar in the Audio devices drop down. This will change the Speaker and Microphone devices to Bose VB-1 (H Block) or VB-S (Ideas Room).
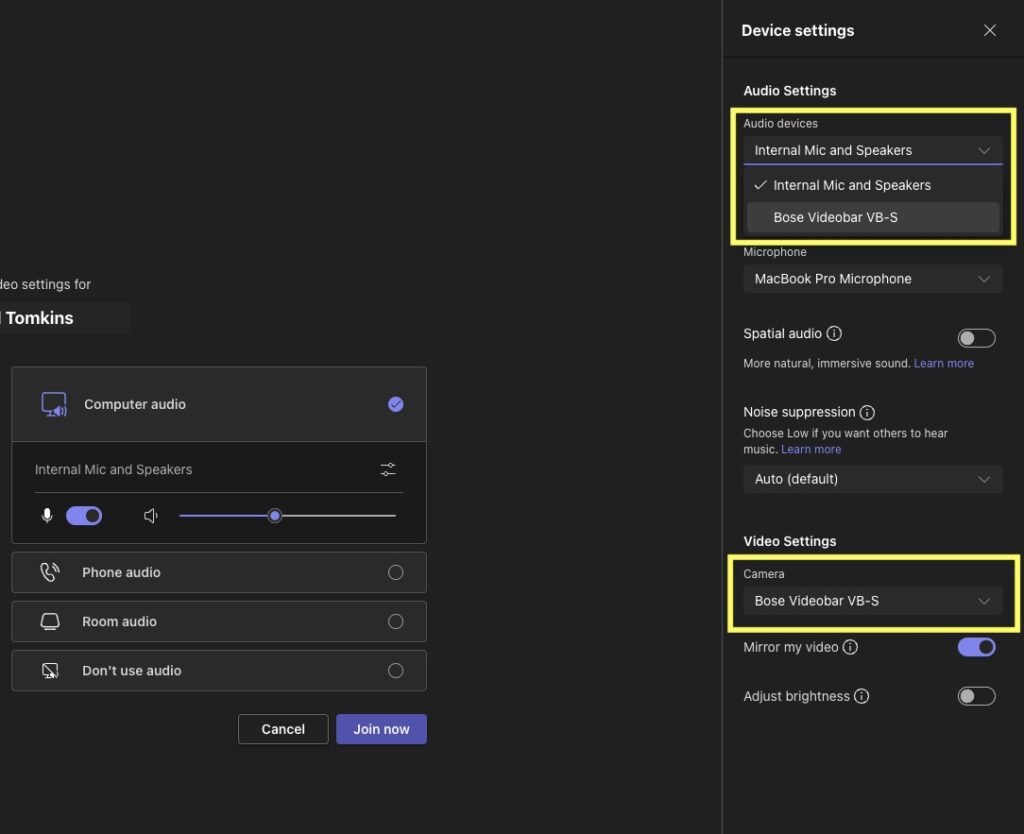
Ensure that Bose VideoBar is also selected as the Camera device. You may now begin your meeting.
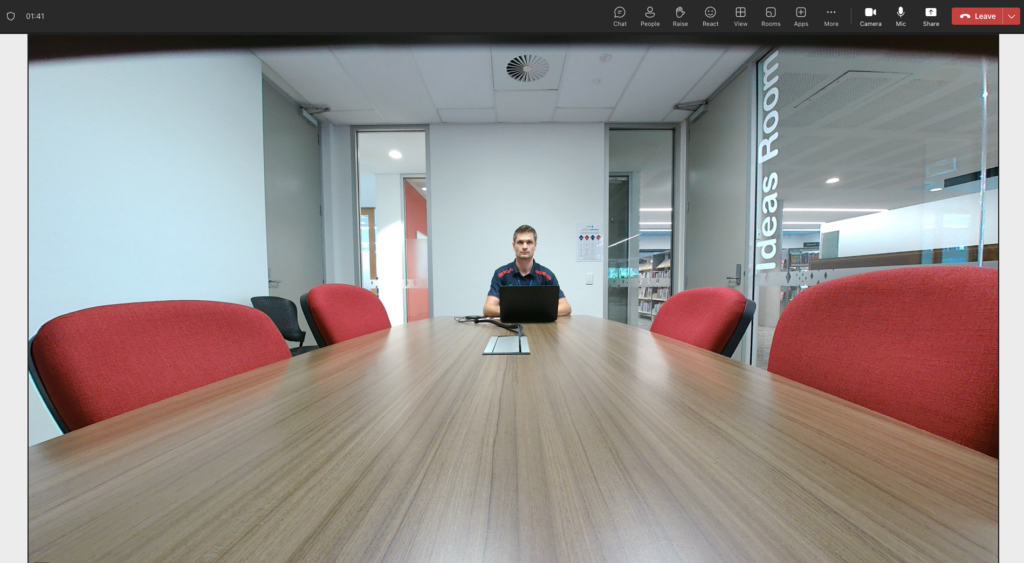
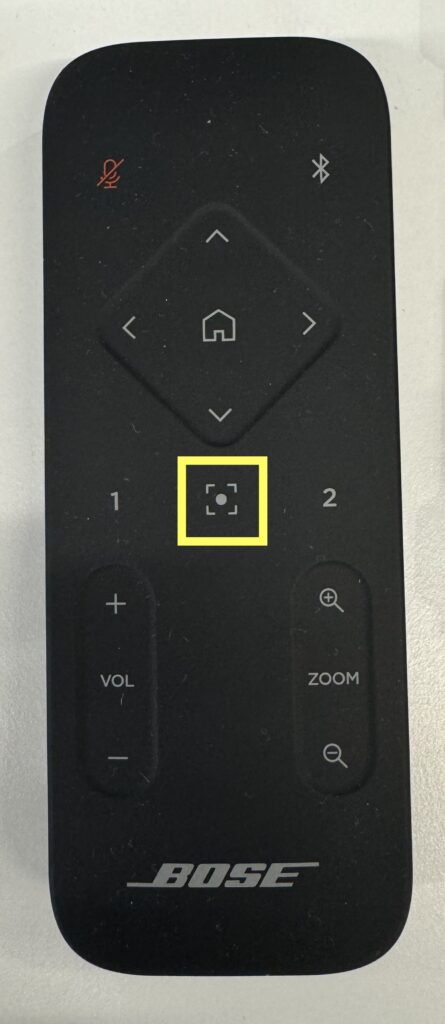
The camera will auto adjust it’s zoom/pan/tilt settings to provide the best image for the number of people in the room. The VideoBar remote can be used to toggle this autoframing feature on/off.
Updated on 26 September 2024

SChool resources

  • St Andrew’s Website
    MyStAndrews Portal
  • Canvas

Resources

  • Main Menu
  • Apple Resources

© 2025 ·

St Andrew's Anglican College Knowledge Base

· All rights reserved