
Adding Users to a Group in Outlook Online #
1. Open your preferred browser and go to https://outlook.office.com. Sign in using your St Andrew’s credentials.
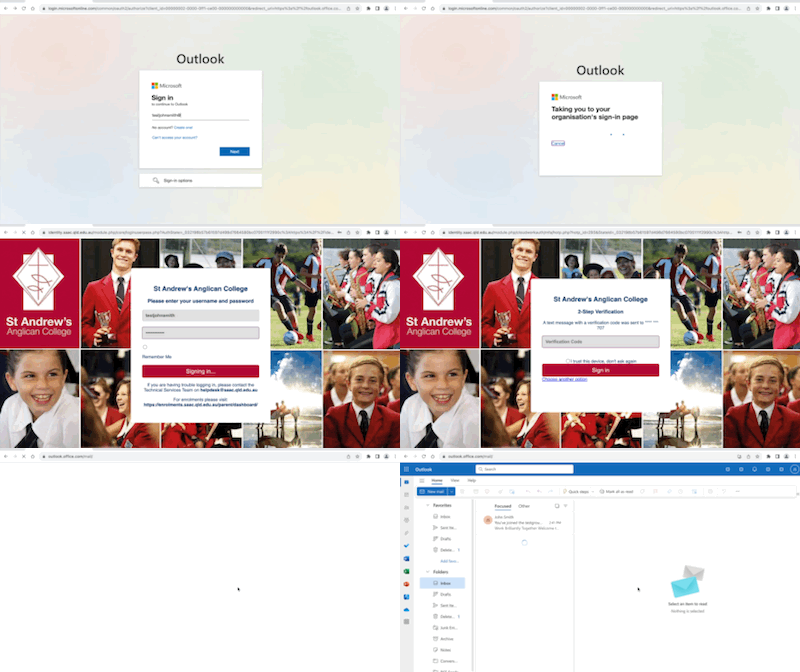
2. Once signed in, click the Outlook app icon
3. In the left sidebar, select the Groups icon

4. With the group open, locate the Members section, which is typically at the top or in the right-hand pane. This will show you the current group members.


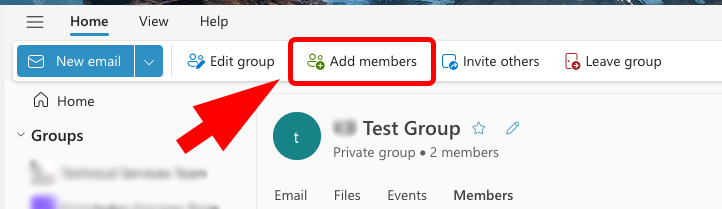
5. Click the Add members button. A search bar will appear—start typing the name or email of the person you want to add. Select the user from the dropdown list. Repeat this step if you want to add multiple members.
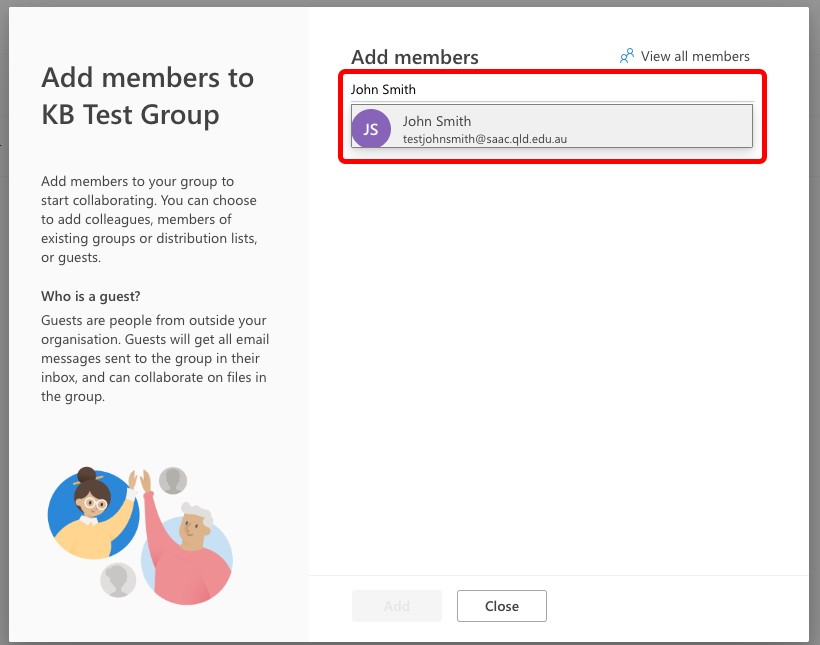
6. After adding the new members, click the Save, Add, or Confirm button (depending on the option available) to finalize your changes.
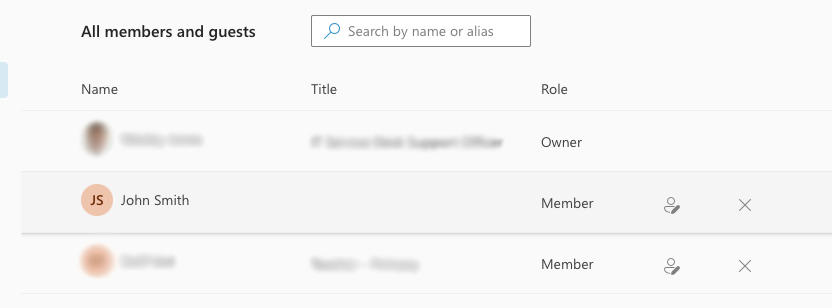
You should now see the newly added members in the group’s members list.
Making a user an owner in Outlook Online. #
1. While viewing the list of Members for the group, select the Person Pencil icon
2. Select the ‘Owner’ role

Once completed, the user will appear as an Owner. Please note that the page may need a refresh after the changes have been made.
Adding Users to a group in Microsoft Teams #
To promote a user to the owner role for Office Groups, this can done through Teams:
1. Open Teams and select ‘Teams’ on the left-hand side

2. Select the group you want to add a new member to, then select the ellipses next to the name of the group, and select ‘Add Member‘

3. After selecting ‘add member’ button, a new window should appear and you’ll have to type in the name of the staff you would like to add, and then select ‘Add’ in the bottom right

Making a user an owner in Microsoft Teams #
1. Select the Groups Icon from the options on the left
2. Select the group you want to modify the roles for, then select the ellipses next to the name of the group, and select ‘Manage Team‘

3. Find the user under ‘Members and guests‘, select the drop down box where it says ‘Member‘, then select ‘Owner‘
