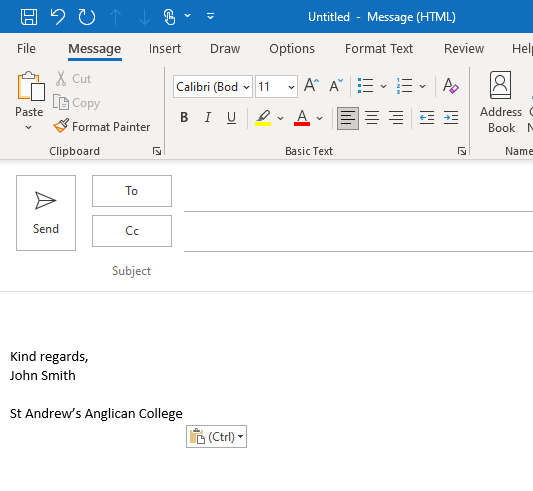
Before starting, save a copy of the college banner to your computer. These banners are usually sent by marketing at the beginning of every year. Alternativley, you can copy and paste an existing college signature from an email you have received.
Creating a signature on a Mac #
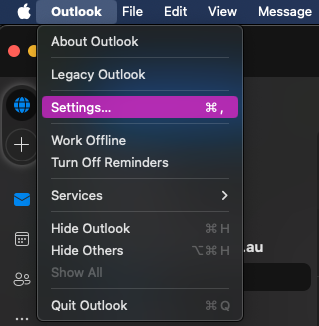
- In Outlook on MacOS, select Outlook from the top menu and then select Settings.
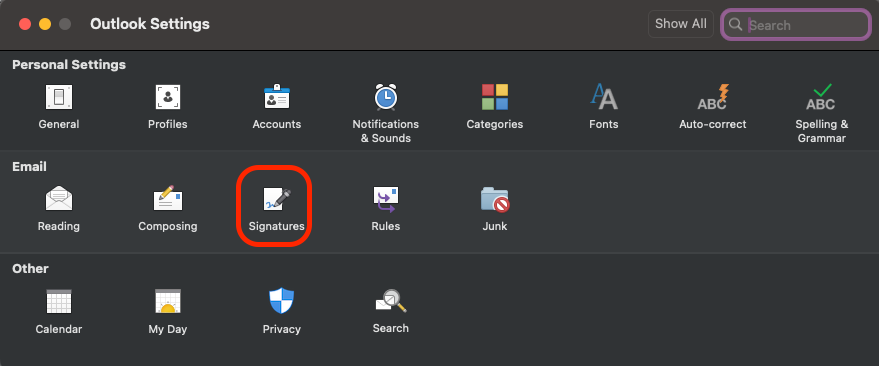
- In the Outlook Settings window, select the Signatures option.
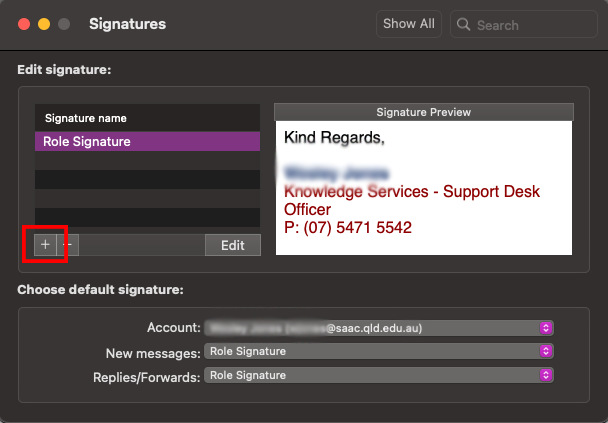
- In the signatures window, select the +/ plus icon to create a new email signature.
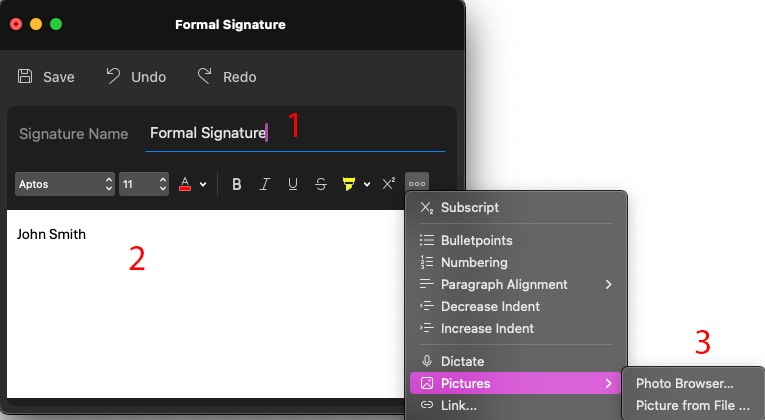
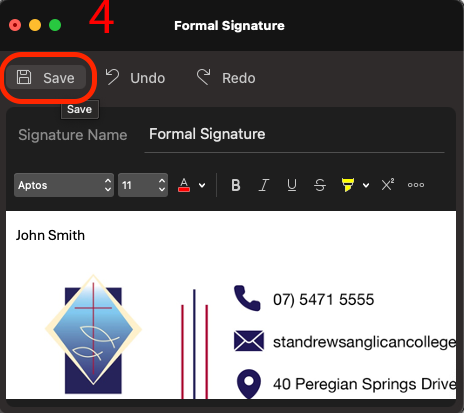
- In the Signatures Editor window, (1) enter a name for the signature (e.g. ‘Formal Signature’) and, using the (2) formatting ribbon, format the details as required. Select the (3) Pictures to locate the downloaded email banner from the desktop. Once the email signature is complete, make sure to select the (4) Save button and close the signature editor window.
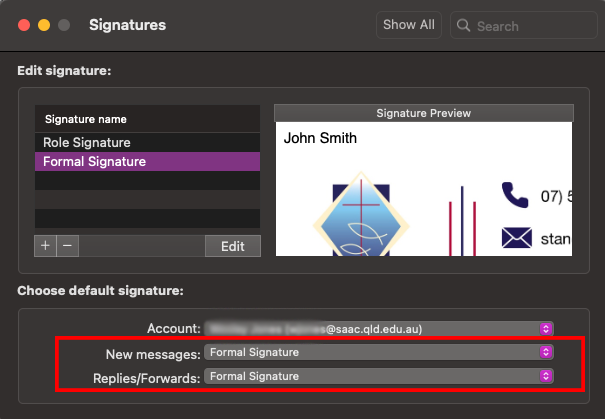
- Returning to the Signatures window select the saved signature for both New messages and Replies/Forward and close the window.
Creating a Signature on Windows #
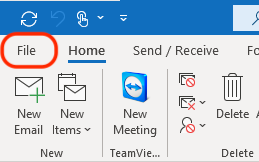
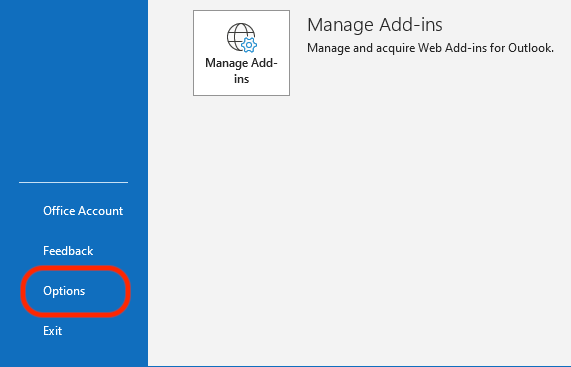
- In Outlook on Windows select the File ribbon and, on the left column menu, select Options.
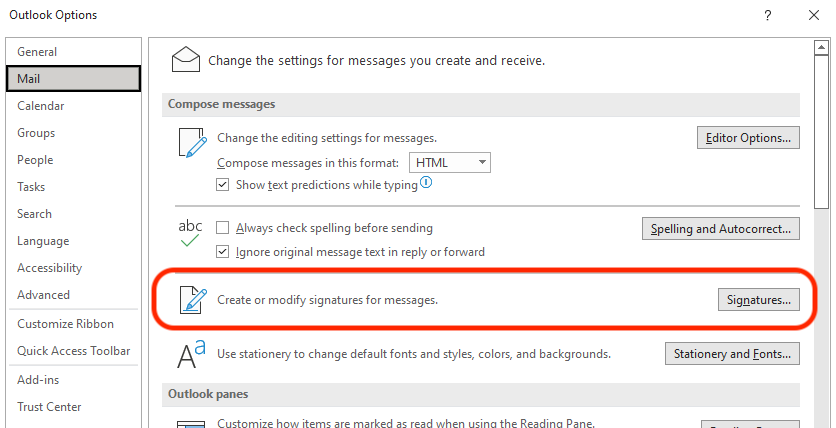
2. In the Options window select the (1) Mail option on the left column menu, then in the Outlook op
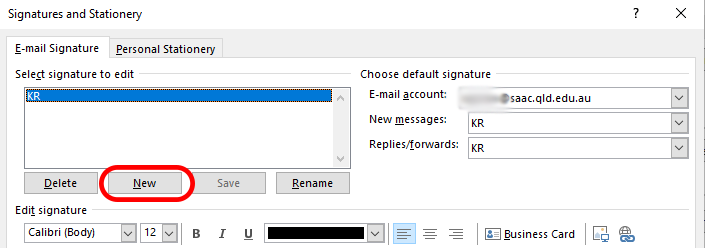
3. In the Signatures and Stationary window select the New button below the signature list box and enter a name for the signature (e.g. ‘Formal Signature’)
4. As the new signature is now listed, click in the content editor, and enter your details. Use the formatting tool bar to format your details as required (Note: to ensure your signature is in accordance with the college style guide you may wish to copy the signature from a staff sender’s email and paste it in the editor window)
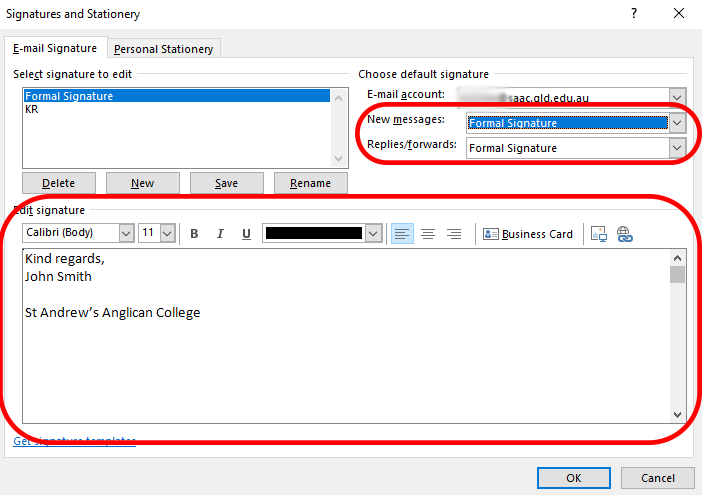
To the right of the formatting toolbar select the (1) Insert Image button to locate the signature banner you have downloaded to the desktop and then select (2) Save
5. Once the email signature is complete select the Formal Signature for both New messages and Replies/ forwards, then select OK to confirm the setting (Note: returning to the Outlook Options window select OK to confirm the created signature)
6. Create a new email to ensure when sending and forwarding there is your email signature.